Spring Boot에서 Spring MVC 활용

* 이 글은 2016년 1월 개인 위키에 올렸던 글을 옮긴 것임을 알려드립니다.

공식 참조 문서를 토대로 Spring Boot에서 JPA와 Spring Data 활용에서 코드 바꿔가기

기존 코드 변경하기

Spring Boot에서 JPA와 Spring Data 활용에서 작성한 Example 클래스를 수정하여 활용하자. 기존 코드에서 cities와 makeCollection 메소드만 제거한다.

1
2
3
4
5
6
7
8
9
10
11
12
13
14
15
16
17
package city;
import org.springframework.boot.SpringApplication;
import org.springframework.boot.autoconfigure.EnableAutoConfiguration;
import org.springframework.web.bind.annotation.RequestMapping;
import org.springframework.web.bind.annotation.RestController;
@RestController
@EnableAutoConfiguration
public class Example {
    @RequestMapping("/")
    String home() {
        return "Hello World!";
    }
    public static void main(String[] args) throws Exception {
        System.setProperty("spring.h2.console.enabled", "true");
        SpringApplication.run(Example.class, args);
    }
}

이는 지워버리는 말고 잘라내기(혹은 리팩토링) 하여 새로운 컨트롤러를 만들어보자.

1
2
3
4
5
6
7
8
9
10
11
12
13
14
15
16
17
18
19
20
21
22
23
24
25
26
27
package city;
import org.springframework.beans.factory.annotation.Autowired;
import org.springframework.web.bind.annotation.RequestMapping;
import org.springframework.web.bind.annotation.RestController;
import java.util.ArrayList;
import java.util.Collection;
@RestController
public class CityController {
    @Autowired
    private CityRepository repository;
    @RequestMapping("/cities")
    public Collection<City> cities(){
        repository.save(new City("Seoul", "Korea"));
        repository.save(new City("Busan", "Korea"));
        repository.save(new City("Tokyo", "Japan"));
        repository.save(new City("Beijing", "China"));
        repository.save(new City("Shanghai", "China"));
        return makeCollection(repository.findAll());
    }
    private static <E> Collection<E> makeCollection(Iterable<E> iter) {
        Collection<E> list = new ArrayList<E>();
        for (E item : iter) {
            list.add(item);
        }
        return list;
    }
}

실행을 시켜보고 브라우저에서 확인하자.
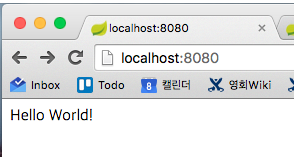
시작은 언제나 Hello World

시작은 언제나 Hello World

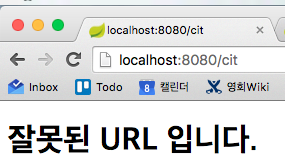
이번에는 앞서 사용했던 /cities 경로로 접근해보자.
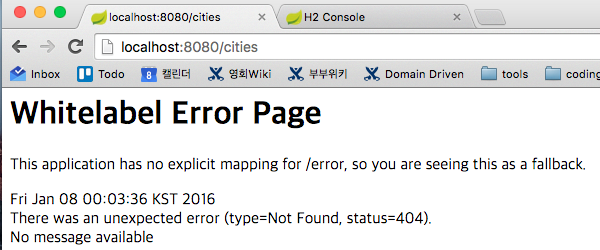
/cities 경로 접근 결과

/cities 경로 접근 결과

기존에 작동하던 코드의 구조만 바꾸었을 뿐인데 안된다. 왜 그럴까?

기준 설정 클래스 변경

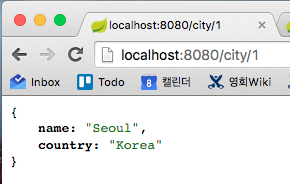
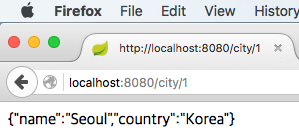
기준 설정 클래스인 Exaple 클래스에서 EnableAutoConfiguration 애노테이션을 SpringBootApplication으로 바꾸자. SpringBootApplication은 자동 설정을 위한 EnableAutoConfiguration과 ComponentScan 애노테이션을 함께 선언하는 효과를 제공한다. 바로 ComponentScan을 통해서 RestController 애노테이션을 부착한 컨트롤러를 등록할 수 있는 것이다. 다시 해보면, 결과가 잘 나오는 것을 알 수 있다.
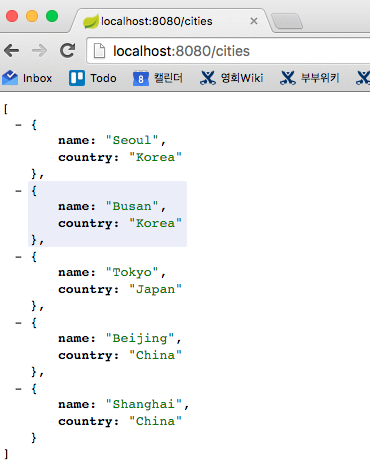
기준 설정 클래스 변경 결과

기준 설정 클래스 변경 결과

데모 혹은 테스트를 위한 구조 변경(Refactoring)

다섯 개의 도시 데이터를 추가하는 코드는 데모를 위한 내용이다. 임베디드 DB를 사용하고 있어서 애플리케이션 구동마다 /cities 요청을 보내야 데이터가 들어간다. 완벽한 해결책은 아니지만, 예시 데이터를 home 메소드에서 넣도록 코드를 바꿔보자.

Example.java 

1
2
3
4
5
6
7
8
9
10
11
12
13
public class Example {
    @Autowired
    private CityRepository repository;
    @RequestMapping("/")
    String home() {
        repository.save(new City("Seoul", "Korea"));
        repository.save(new City("Busan", "Korea"));
        repository.save(new City("Tokyo", "Japan"));
        repository.save(new City("Beijing", "China"));
        repository.save(new City("Shanghai", "China"));
        return "Hello World!";
    }
...

이렇게 되면 CityController의 메소드는 한 줄이 된다.

1
2
3
4
@RequestMapping("/cities")
public Collection<City> cities(){
    return makeCollection(repository.findAll());
}

우아하지 않지만 Hello World!를 보고 나면 다섯 개의 도시 데이터가 추가된다.

시작은 언제나 Hello World

시작은 언제나 Hello World

/cities 로 접근하면 데이터가 잘 들어갔는지 확인할 수 있다.

기준 설정 클래스 변경 결과

기준 설정 클래스 변경 결과

HTTP 요청 처리 메소드 추가하기

Spring MVC 기능을 이용해 메소드 하나를 추가해보자. /city/ 경로 뒤에 숫자로 도시 ID를 넣으면 도시 데이터를 출력하는 메소드다.

1
2
3
4
@RequestMapping(value="/city/{cityId}", method= RequestMethod.GET)
public City getCity(@PathVariable Long cityId){
    return repository.findOne(cityId);
}

앞서 Spring Boot에서 JPA와 Spring Data 활용에서 엔터티 작성 시에 ID를 자동생성하게 했다. h2 기준으로는 1부터 순서대로 다섯 개가 들어가 있다.

cityId가 1인 데이터 확인

cityId가 1인 데이터 확인

여러분의 브라우저 유형과 설정에 따라 조금 다른 화면을 볼 수 있다.

브라우저 환경에 따라 조금 다르게 보일 수 있음

브라우저 환경에 따라 조금 다르게 보일 수 있음

JSON 출력 결과 이해

결과 화면에 대해서는 별다른 작업을 하지 않았는데, JSON 표기로 화면에 나타난다. 어떻게 이것이 가능할까? 스프링은 HTTP 요청과 응답 메시지 변환을 위해 HttpMessageConverter 인터페이스를 사용한다. 부트 자동 설정을 통해 RestController(혹은 ResponseBody) 애노테이션을 부착한 경우 MappingJackson2HttpMessageConverter가 쓰여 메시지 변환을 담당한다. RestController은 Controller 중에서 요청 처리 메소드의 결과가 ResponseBody 애노테이션을 기본으로 전제하는 경우 편리하게 쓰도록 고안된 것이다.

에러 처리 변경

앞에서 보았던 에러 페이지는 부트가 제공한다. BasicErrorController가 동작한 것이다. ErrorController 인터페이스를 확장한 구현체를 등록하면 에러 처리 내용을 변경할 수 있다. 그러나, 이번에는 잘못된 URL 요청이 오는 경우 즉, 404 오류만 별도 페이지를 보여주게 해보자.

부트 내장 서블릿 컨테이너 수정

다음과 같이 EmbeddedServletContainerCustomizer 구현을 통해서 새로운 에러 페이지를 추가한다. 새로운 클래스를 만들지 않고 Exmple 클래스를 수정했다.

1
2
3
4
5
6
public class Example implements EmbeddedServletContainerCustomizer{
...
@Override
public void customize(ConfigurableEmbeddedServletContainer container) {
    container.addErrorPages(new ErrorPage(HttpStatus.NOT_FOUND, "/404.html"));
}

에러 페이지 작성과 등록

이제 404.html을 작성한다.

1
2
3
4
5
6
7
8
9
10
<!DOCTYPE html>
<html lang="ko">
<head>
    <meta charset="UTF-8">
    <title></title>
</head>
<body>
    <h1>잘못된 URL 입니다.</h1>
</body>
</html>

 주의할 사항은 html 파일의 위치가 프로젝트 루트 바로 아래의 static 디렉토리 아래 있어야 한다는 점이다.

이제 잘못된 URL을 입력하면 즉, HTTP 요청과 대응하는 RequestMapping이 없는 경우 404.html이 나타난다.

에러 페이지

에러 페이지

중간에 겪은 문제 공유

404.html 파일이 불리지 않음

참조 문서에서 static 대신 resources 디렉토리도 가능하다고 하여 메이븐 관례로 만들어진 src/main/resourcs 아래 html 파일을 두었더니 애플리케이션 실행 중에 찾지 못했다.

별도 수정을 하지 않는다면 아래 기본 경로 설정과 같은 디렉토리 아래에 정적 파일이 있어야 한다.

1
spring.resources.static-locations=classpath:/META-INF/resources/,classpath:/resources/,classpath:/static/,classpath:/public/ # Locations of static resources.

참고 문서


Popit은 페이스북 댓글만 사용하고 있습니다. 페이스북 로그인 후 글을 보시면 댓글이 나타납니다.